According to statistics shared by the U.S. Department of Agriculture, food waste is estimated to be 40% of the total food produced. Mushrooms can be grown well by using animal manure, food waste, and other organic materials.
Mushrooms convert digested substances into protein-rich foods
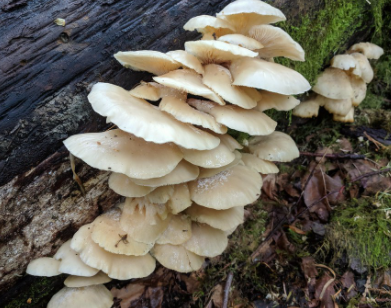
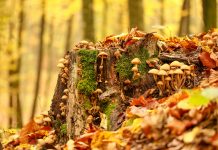
Oyster mushrooms growing on a log.
Embracing off-grid living requires being self-sufficient and growing mushrooms can help you boost your food security as you can recycle wasted food to nourish your mushrooms. Do note that if you want to live off food grown on your land, then you need to find a balance between choosing food items that are easy to grow (you need to be strict with your time and energy) but still nutritional enough to keep you healthy. Learning how to grow mushrooms is simple, easy, and cost-effective. Your survival gardening needs to incorporate growing mushrooms to improve your standard of living off the grid!
Why should you grow mushrooms?
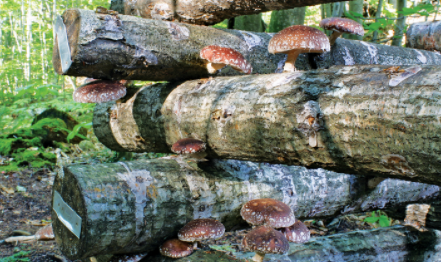
Mushrooms are a valuable superfood that is packed with nutrients that other vegetables typically do not provide. Varieties such as shitake mushrooms and oyster mushrooms are rich in vitamins and minerals so much so that consuming them regularly counters the need to take health supplements. If you are living off the grid, then incorporating mushrooms in your diet is an organic means of enjoying a balanced diet with ample micro and macronutrients. Using a mushroom log to grow your delicious mushrooms will last you for several years and will barely require any maintenance on your part. Keep them in a moist location with shade, and let your mushrooms do the rest!
Which mushrooms should I grow?
When you are living off the grid, you get to enjoy an independent style where you are in control. However, this lifestyle comes with a list of responsibilities of its own. You do not want to overburden yourself by choosing mushroom varieties that require regular attention and specific growing environments to fruit properly. When choosing which mushrooms to grow when you are living off the grid, it is recommended that you pay attention to the following:
- Which mushrooms can be grown all year long as opposed to specific seasons?
- How long before your mushrooms are ready for consumption?
- Which mushrooms are the hardiest and least vulnerable to environmental hazards?
As a beginner, it is recommended that you grow oyster and shiitake mushrooms. Log cultivation is an easy and low-maintenance growing tool that will help you harvest nutrient-rich mushrooms through summer and spring. Once you get a hang of growing mushrooms, you can expand your survival gardening to the following delicious mushroom varieties:
- Maitake
- Turkey tails
- Reishi
- Lion’s mane
- Wood ears
How to grow mushrooms using log cultivation?
Mushrooms logs are a low-maintenance means of producing high yields of mushrooms in a limited amount of space. Depending on which mushroom species you grow and the log you choose, log cultivation can typically last you 3 – 8 years.
Here is how you can use mushrooms using logs:
Choosing a log
You need to inoculate logs that have been extracted from hardwood trees that are appropriate to the species of mushroom that you are trying to grow. For shiitake mushrooms, it is recommended that you use oak, sugar, maple, or red maple trees to get your log. Meanwhile, oyster mushrooms grow best in white birch tree logs. Generally, mushroom-growing logs extracted from alder, birch, oak, maple, aspen, willow, and elm trees will do well. Do note that the tree you choose needs to be alive (even if it is dormant) when you cut your log pieces from it to encourage your healthy mushroom growth.
Drill your mushroom logs
To inoculate mushroom logs, you will need to drill 1-2-inch-deep holes in them so that your mushroom spawn can inhabit them. Begin by cutting your mushroom logs to a depth of 4 feet. Follow this by allowing your cut pieces of logs to age for 2 – 3 weeks. Next, you will need to drill holes starting from 2-inches near the end of your log. Space your holes 6-inches apart from each other. Your rows of holes should be kept a few inches apart from each other, approximate 3 – 4 inches along with the girth of your log. Note that drilling holes carefully is one of the most important steps in inoculating a log for mushroom growth. Take your time with this process!
Introducing your mushroom spawn
This stage is where you inoculate your log. To do so, you can use agar wedges, grain spawn, or liquid culture. Use sawdust colonized by shiitake or oyster mushroom spawn and add it to your log holes. Make sure that you add enough spawn such that it is securely packed in the holes that you have drilled. Use plugs to cover your log holes. You do not have to make your own, you can buy them from a general store or organic farming outlet near you. Keep your log in a moist location with plenty of shade to encourage mycelium to begin crawling and spreading. Depending on which species of mushroom you are growing, your batch may be fully colonized in 2 – 3 weeks.
Conclusion
Few weeks from inoculating, your mushrooms will fruit! Every day your baby mushrooms will grow larger until they are ready for harvest. That is when you can collect a few of these earthy, delicious, and fascinating bounties of nature to cook meals while living off the grid. You can keep reusing the same log for a couple of years without compromising on the yield of your mushrooms.
Image links
https://live.staticflickr.com/892/40957073990_77a69a073f_b.jpg
https://iamcountryside.com/wp-content/uploads/2019/03/GrowingGinsengMushrooms1.jpg
https://image.shutterstock.com/image-photo/mushroom-cultivation-mushrooms-spawn-farm-260nw-1450087208.jpg


